Corbel Shelf Fitting Instructions ...
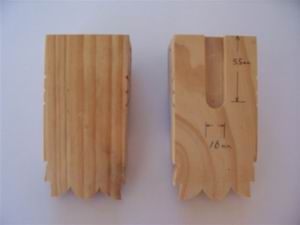
1. Router or chisel a trench out on the back of the corbels 16mm wide by 5mm deep and 55mm long
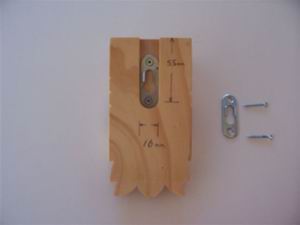
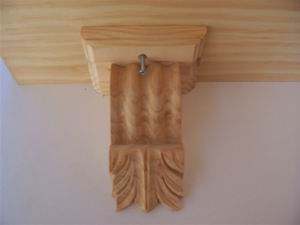
2. Fit keys and screws as pictured.
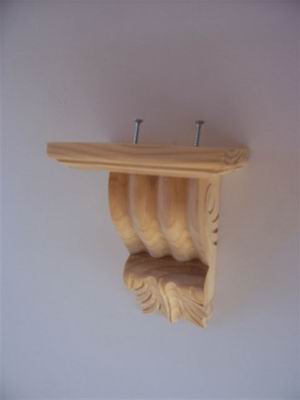
3. Make your top blocks 120mm x 95mm x 19mm. Router 3 edges to a shape if desired and drill holes as pictured.

4. Screw top blocks onto corbels using 1 1/2" 8gauge wood screws. The top block should be flush at the back. There should be even overhang either side. Pilot holes should be drilled first to avoid any splitting.
5. Next, mark your wall where you want the shelf, making sure the holes are at the same height (use a spirit level). The distance between the holes will vary depending on the length of the shelf and should be about 220mm - 350mm shorter than the length of the shelf. EG. Using a 900mm long shelf the holes should be about 650mm apart.
If drilling into brick use 6mm plastic plugs. The screw should be about 1 1/2" long and must be 8 gauge thick. Leave the screws protruding from the wall about 5-7mm.
6. Place corbel over the screw head into the key and pull down till it locks in. You may have to adjust the screw inwards for a firmer fit or outwards to loosen to place the corbel on it.
7. Once the two corbels are secure on wall place your shelf on top and screw up into the shelf from below. A shelf around 140-190mm deep would be ideal.
Download these instructions as a PDF file HERE.